Below are various subject areas, each containing one or more "How To" topics. Click a subject area to browse what topics are available.
If you are still having issues, please contact the Technology Help Desk. Submit a ticket using the IT Technology Help Desk app in MAVzone, call 970-248-2111, or visit us. The Technology Help Desk is located in Tomlinson Library, 1st floor.
Change in MAVzone
You can change your MAVzone login password any time you like from within MAVzone. Once you are logged into MAVzone, follow these steps:
- In the Navigation Bar on the left side of the window, click the MY ACCOUNT button.
- Next, click Personal to expand that section.
- Find the Password Expires setting and to the right click the CHANGE button.
- Follow the prompts and click the Change button to confirm.
Be sure to update all devices that connect to the CMU WiFi immediately following a password change. These devices will persistently try to connect, with the old password, and will quickly lock your account. If you synchronize your CMU email to a mobile device, be sure to update the password in the email application as well.
Change Out of MAVzone
You can also change your password before actually logging into MAVzone by following these steps:
- Using a web browser, go to https://www.coloradomesa.edu. Click the MAVzone button.

- The login screen will appear. Click the Change my password button.
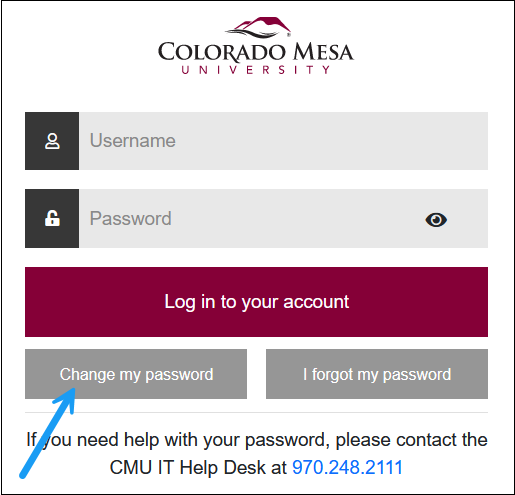
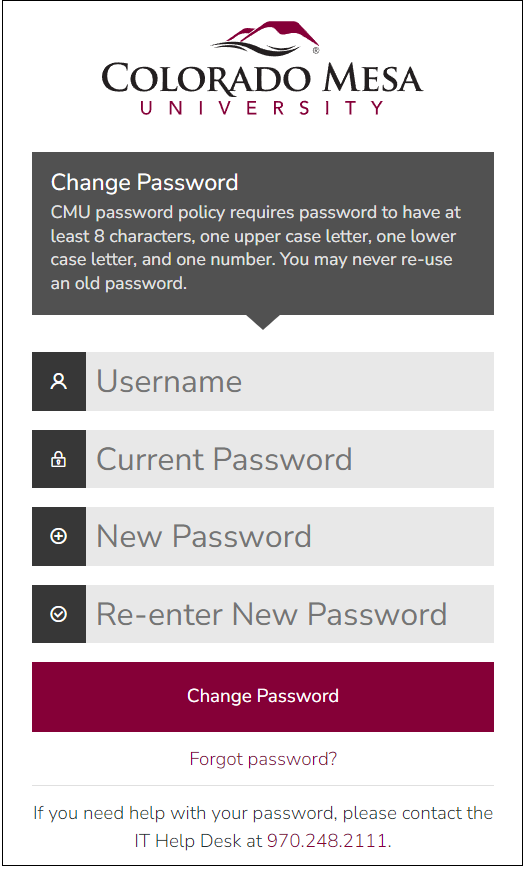
- Next, the Change Password dialog will appear. Enter your Username, Current Password, New Password and re-enter your New Password. Then click the Change Password button.
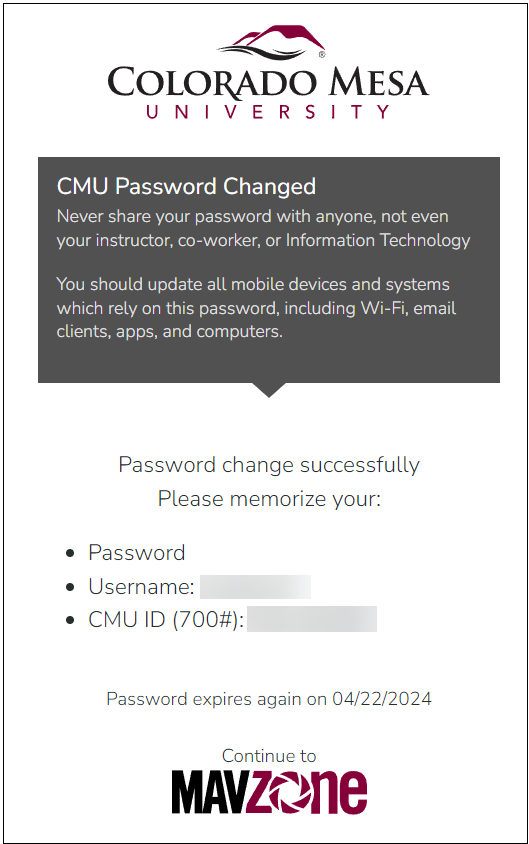
- Your password will then be reset and the following dialog box will appear:
Every semester midpoint, department heads are asked to submit new/updated/deleted software requests for the upcoming semester. Be sure to convey your requests to your department head in time to prepare for the upcoming semester. Click the link below search for software installed in computer labs and classrooms at all campus locations.
Based on the Internet browser and operating system you have, choose from the following How To documents:
- On your device, locate the WiFi connection tool and select CMU WiFi.
- Enter your MAVzone login credentials, and click or tap Join (iOS), Connect (Android), or the confirmation button shown.
- iOS will prompt you to accept the certificate. Do so by clicking or tapping Trust.
- Android devices will ask for the following additional items. Set as follows:
- EAP method = PEAP
- Phase 2 Authentication = MSCHPAV2
- CA certificate = (Unspecified)
- User certificate = (Unspecified)
- Identity = MAVzone username
- Anonymous Identity = blank
- Password = Your password.
- At the CMU Network Access form, enter your MAVzone login credentials. Click or tap Log In.
- At the Create Device screen, enter a name for your device; e.g., My iPhone.
- Click or tap the checkbox to accept the terms of use.
- Click or tap Create Device.
- Your device may disconnect and reconnect automatically. If not, return to the WiFi list on your device and select CMU WiFi again.
- From this point forward, your device should automatically connect when you are within range of the CMU WiFi.
- If you are having issues connecting, some devices make use of a Private (iOS) or Random (Android) MAC address. Try turning this off. For iOS, tap Settings, Wi-Fi, then the Information icon for the given network. Next, tap the slider button for Private Address. To turn off on Android, open Settings, then tap Wi-Fi. Tap Gear icon next to the given WiFi network. Tap on MAC address type. Tap Use phone MAC.
Access to the CMU Visitor wireless network is now self-configured. Individuals can easily connect to the CMU Visitor network by following the steps below. Be sure to read the entire list of steps below completely before performing.
- On your device, locate the WiFi connection tool and connect to CMU Visitor.
- If not redirected to your web browser, launch your web browser. Complete the CMU Visitor Access form by entering a personal email address, your cell phone number and your name.
- Click or tap the checkbox to accept the terms of use.
- Click or tap Register.
- The CMU Visitor Access form will appear with your email address as the login name. You will be prompted for a password.
- Shortly, you will receive a text containing a 6-digit visitor access code. This is your password.
- Enter this password.
- Click or tap the checkbox to accept the terms of use.
- Click or tap Log In.
Faculty/staff hosting a group, may request a single sponsored account to be created for the group. Please create a Help Desk ticket through Web Help Desk at least 1 week prior to the event. If you have an urgent need, please call the Help Desk at 970-248-2111.
Streaming Media, Smart TVs, Gaming Systems
- Obtain the wireless hardware address for your device. This address may be referred to by one of several names; hardware address, MAC address, WiFi address, physical address. See Locating a Device Hardware Address for help in finding your device’s address.
- Using a device that is already registered with CMU WiFi, log in to MAVzone.
- In MAVzone, launch the app called Network Device Registration.
- Log in with your MAVzone credentials.
- Enter the name of your device. (My WiFi Printer, My Nintendo Switch, etc.)
- Enter the MAC Address for your device.
- If you want to access this device from your other devices, check Enable AirGroup. Additionally, you can share this device with other users by entering their MAVzone login name(s).
- Check or tap the checkbox to accept the terms of use.
- Click or tap the Create Device button.
- You will receive an email to your CMU account that contains the password to connect your device to CMU PSK. Ignore the instructions in this email that talk about CMU WiFi. Instead, look for the CMU PSK Instructions.
- Note the network password provided.
- Now, on the consumer device connect to CMU PSK. Enter the network password and click or tap the button to confirm the connection.
Dorm rooms have Ethernet ports to which you can connect devices that offer an Ethernet port.
Connecting your Computer via Ethernet
- Connect your computer to the Ethernet port in your dorm room with an Ethernet cable.
- Launch your web browser. The browser should automatically redirect to the Network Device Registration page.
- Log in with your MAVzone credentials.
- Enter the name of your device.
- Notice that the MAC address is automatically populated. This is the MAC address of your Ethernet adapter.
- Check or tap the checkbox to accept the terms of use.
- Click or tap the Create Device button.
- Wait about 15 - 20 seconds and your computer should automatically reconnect. Test by trying to load an external web page.
- If this doesn't work, simply unplug the Ethernet cable from your computer, wait 15 seconds, then plug it back in. Now test by going to an external web page.
Connecting Other Devices via Ethernet
- Obtain the wired hardware address for your device. This address may be referred to by one of several names; hardware address, MAC address, physical address. See Locating a Device Hardware Address for help in finding your device’s wired address.
- Using a device already connected to the CMU network, launch your web browser and log in to MAVzone.
- Launch the app called Network Device Registration.
- Enter the name of your device. (My Nintendo Switch, My Xbox, My Laptop, etc.)
- Enter the MAC Address for your device.
- Click or tap the checkbox to accept the terms of use.
- Click or tap the Create Device button.
- Wait about 15 - 20 seconds and your computer should automatically reconnect. Test the device.
- If this doesn't work, simply unplug the Ethernet cable from your device, wait 15 seconds, then plug it back in. Now test the device.
Although most modern TVs will work properly, it is important that you purchase a TV with a QAM Digital tuner. Check the manufacturer’s specifications and/or your electronics store before purchasing a television. A unit without this specific type of digital tuner will not receive campus cable TV programming.
If your TV doesn't have a QAM digital tuner, you can purchase a QAM Digital Converter Set Top Box. Not all digital converters are QAM. Make sure the product says QAM and not ATSC. For reference, the iView 3500STBII Multi-Function Digital Converter Box is a converter box that has a QAM digital tuner.
- Make sure the television is plugged into power. Make sure a coax cable is connected between the television and the cable jack on the wall.
- Turn on the television and set your input to TV.
- Go into your television’s Menu. Select your Channel sub-menu. On some televisions, it may be called Tuner or TV. It will look slightly different on each brand of television.
- Make sure the television is set to search for Cable and not Antenna or Air.
- Select Auto Scan. Some televisions may say Auto Tune or Auto Program.
- The process should take 5 – 15 minutes to complete depending on your television.
Troubleshooting
- TV won’t power on. Make sure the electrical outlet is functioning. Try plugging in another device into the outlet to check if it’s working. If the outlet is not working, report the issue via this link, Maintenance Issues.
- TV doesn't find any channels during the channel scan. Make sure the coax cable is securely attached to both the TV and the wall jack. Double-check that your TV’s digital tuner is a QAM type tuner. Try the channel search process again.
- Using a QAM digital converter set top box. Make sure the coax cable is connected to the Antenna-In port (coax) on the set top box. Make sure the set-top box is connected to the TV. Connection type will vary depending on your TV and converter set top box. Common types include Ant-Out, HDMI, and RCA. If the digital converter box starts scanning immediately, stop the scan. Make sure the ‘Signal Type’ is set to Cable. Then start the scan again.
- If you still don’t have any cable channels appearing on your TV, please submit a work order detailing the issue. Use IT Help Desk app through MAVzone, or call the IT Help Desk at 970-248-2111.
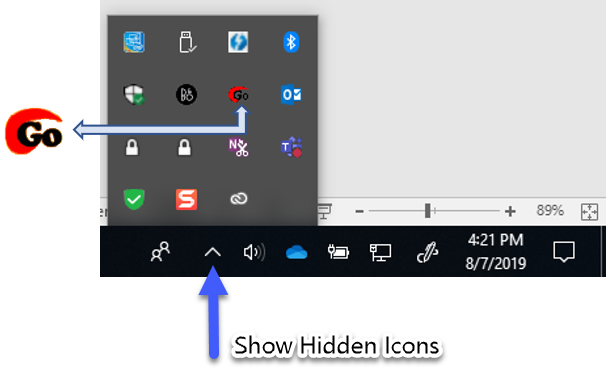
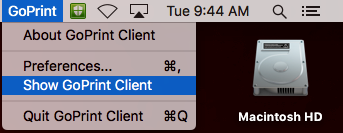
After sending a print job from a campus computer to a campus printer, the GoPrint client should automatically launch. The GoPrint client is used to release your jobs or cancel them. However, sometimes the client doesn't launch on its own so you have to perform a manual launch.
- For Windows, access the GoPrint icon from the System Tray. This is the area located at far right-hand side of the Windows Taskbar. Sometimes icons in the System Tray are hidden. Click on the Show hidden icons button to see those additional tray icons. Once you see the GoPrint icon, double-click to launch.
- For OS X, look for GoPrint in the menu bar, near the clock. Click GoPrint, and in the menu that appears, click Show GoPrint Client to launch.
User accounts and data are automatically protected with an extra layer of security called Multi-Factor Authentication (MFA). When accessing certain CMU applications and services online, you will be prompted for a numeric code that will be sent to your mobile device.
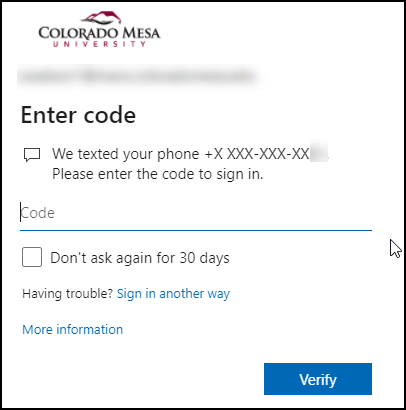
Once you receive the 6-digit code on your mobile device, enter it into the dialog as shown above. To avoid repeated verification requests on personal devices select the option Don't ask again for 30 days, before you click Verify. Then click Verify.
This setting only applies only to the particular browser you are using on that device. Never choose this option on public devices. After you click Verify, the application or service will load.
An alternate method for MFA verification is through an app called Microsoft Authenticator. This app lets you store numerous MFA accounts and verification will work directly through the app. With Authenticator you will receive a prompt on your smartphone to approve your sign in request. A 2-digit code will appear on the device you are accessing. Type the two digit code into your phone and tap Yes to confirm it's you. Your login will then complete showing you the content you want to access.
The following steps detail how to set up Microsoft Authenticator on your and iOS smartphone, but the steps are similar for an Android device.
- You will need your smartphone and another Internet connected computing device to configure Authenticator.
- On the other computing device, log in to MAVzone, and click on the MY ACCOUNT button in the navigation bar.

- Next, select PERSONAL and locate the MULTI-FACTOR AUTHENTICATION option. Click the Settings button.
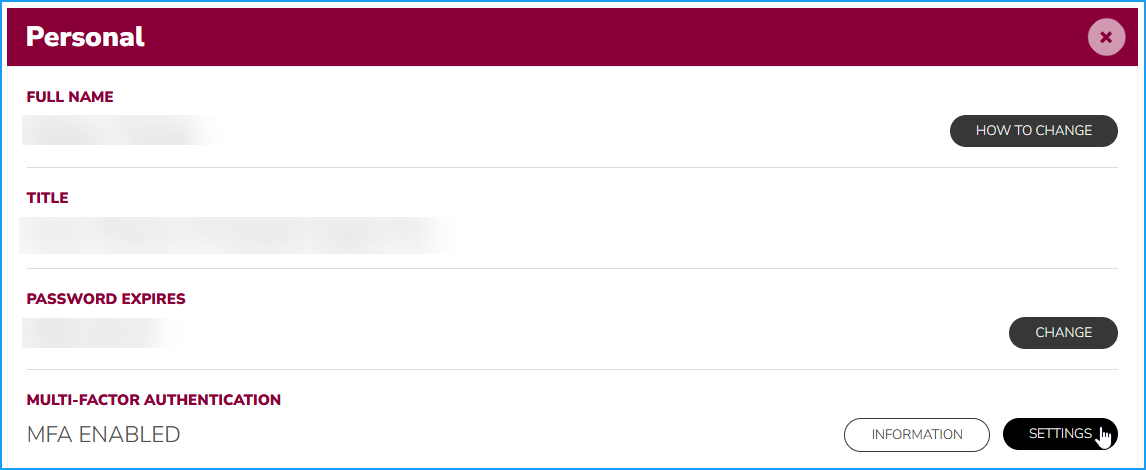
- The following page will appear in your browser.
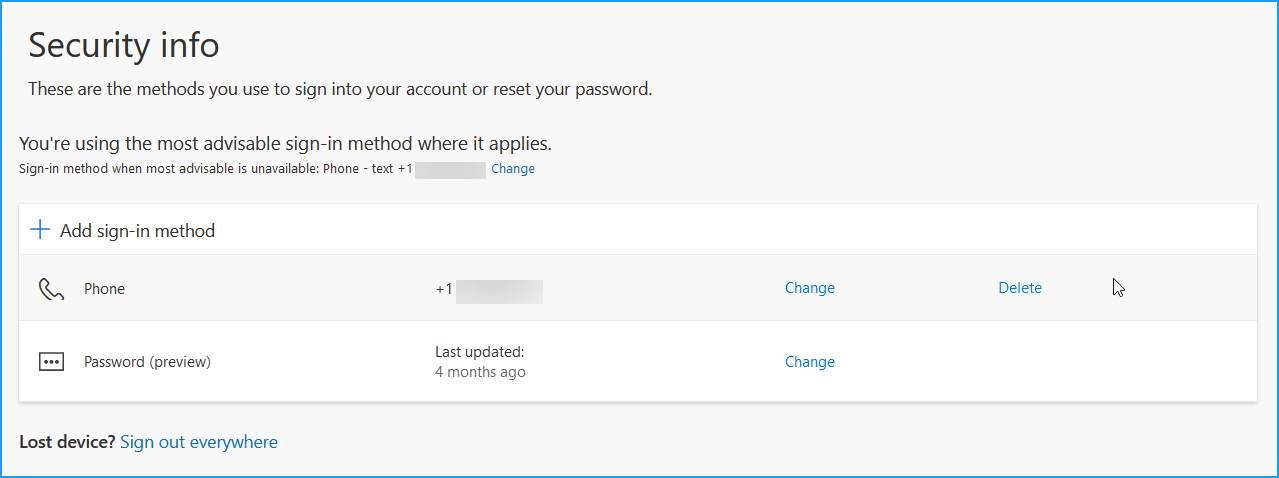
- Next, click Add sign in method. The following dialog box will appear:
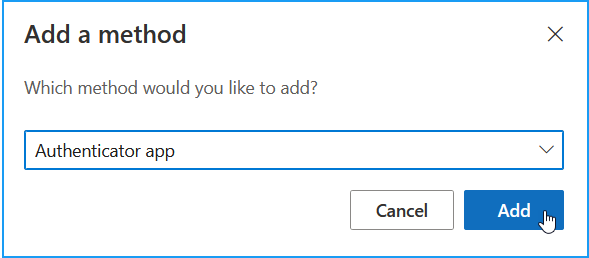
- In the drop-down box, choose Authenticator app. Click the Add button. The following dialog box will appear:
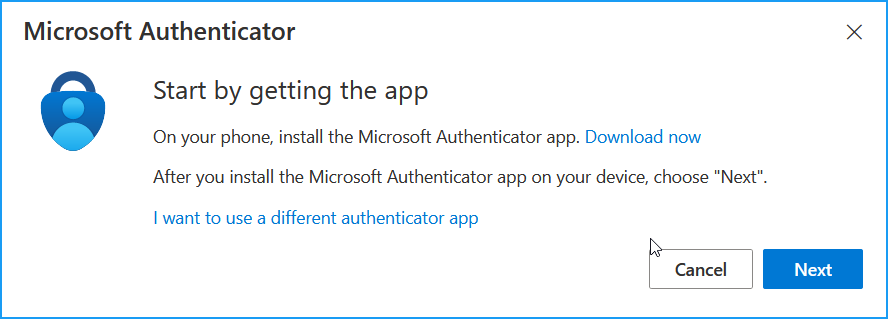
- Now on your smartphone, go to the App store and search for and install Microsoft Authenticator to your phone.

- Launch the app. You will need to agree to the Privacy Statement, tap Accept. Then choose if you want to help Microsoft improve this product. It's optional, make your choice tap Continue.
- Next, the app will ask you to Sign In. Scroll down a bit and tap Scan a QR Code. Next Authenticator will ask for permission to access your web cam. You must permit this in order to continue. Authenticator will now show you a camera view to scan the QR code. Before scanning, follow the steps below.
- Back on the computing device click the Next button on the dialog from step 6. The following dialog box will appear:
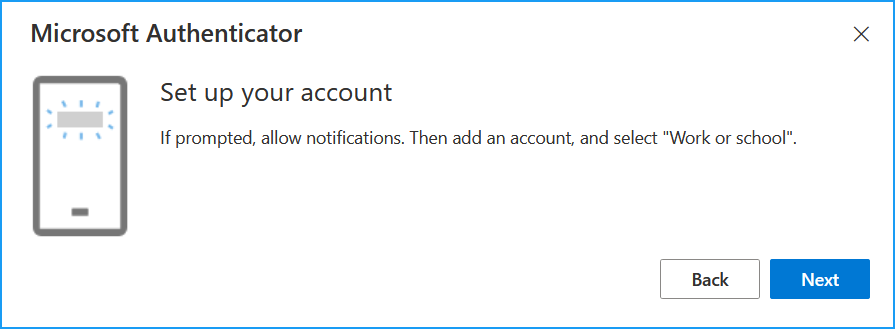
- Click the Next button and the following dialog box will appear:
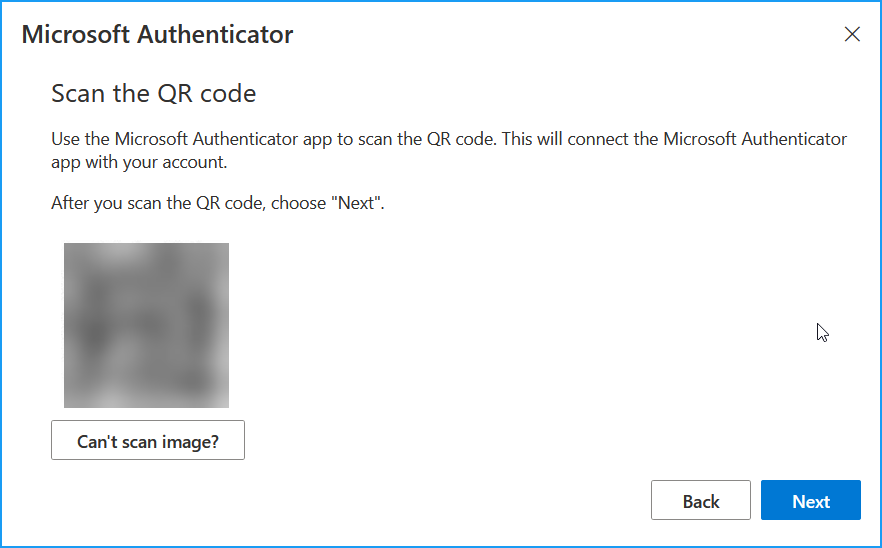
- Now, point your phone's camera at the QR code. It will scan pretty quickly and add a CMU account to the Authenticator app. You may be asked for Authenticator to send you notifications. You must allow this in order for your phone to use Authenticator. Tap Allow. Back on the computing device, click Next.
- Next, you'll get a verification prompt on your smartphone asking for a 2-digit number to be entered. This 2-digit code should now appear on your computing device. Below are screen shots of your phone and your computing device.
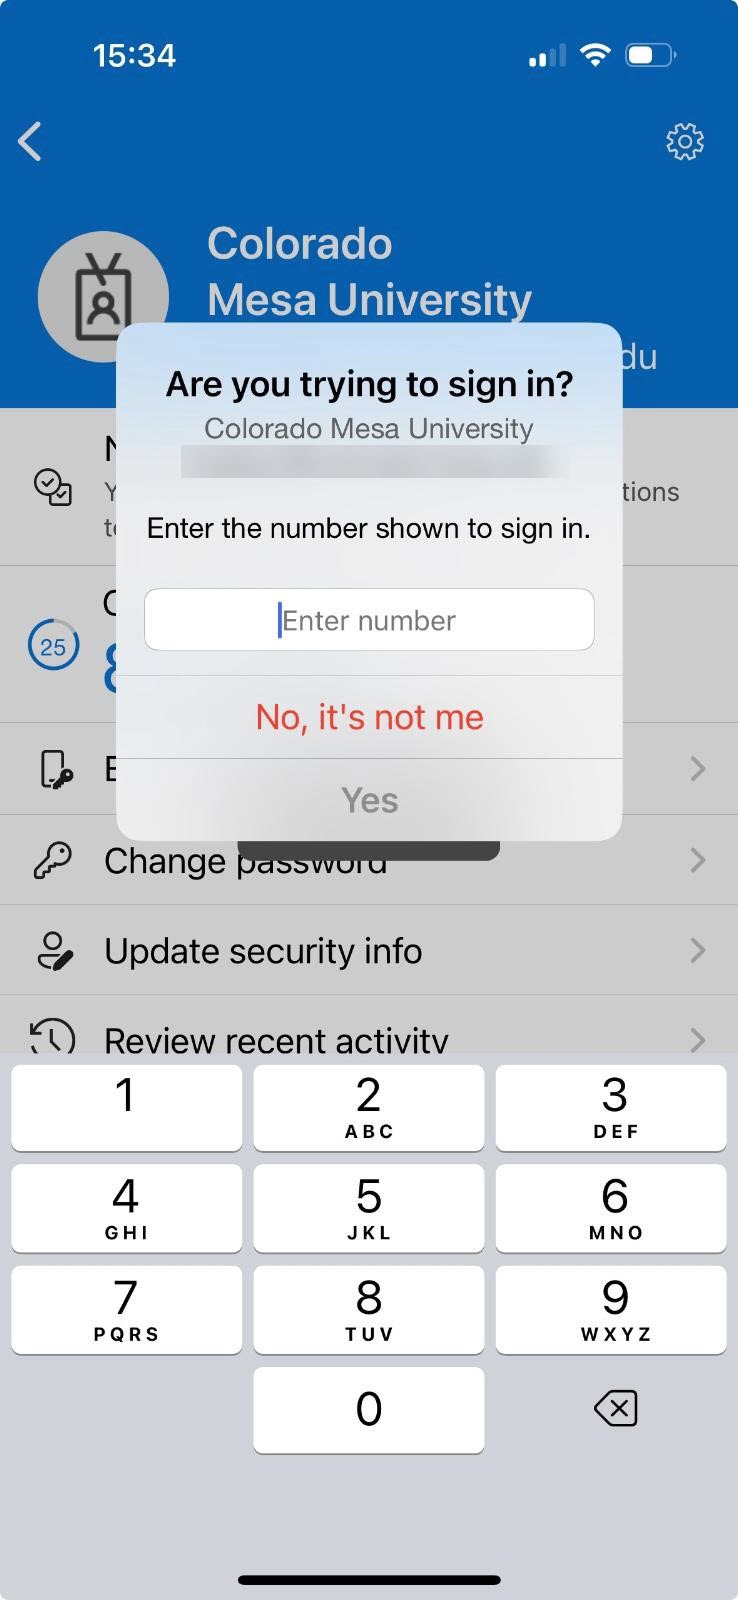
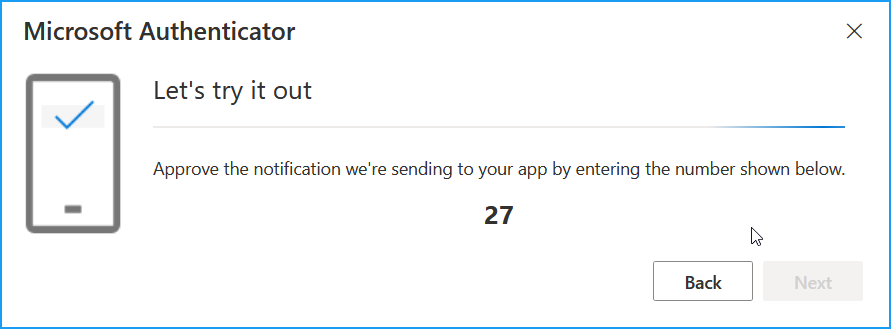
- On your smartphone, enter the 2-digit code and tap Yes to confirm the sign in. On the computing device, click the Next button. The following dialog will then appear:
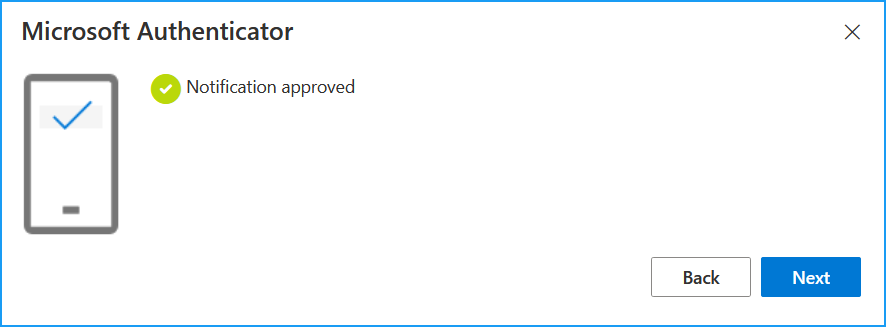
- Click the Next button, and a final notification of success will appear:
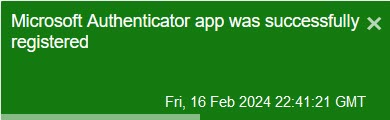
- Now your MFA is configured to use Microsoft Authenticator when accessing CMU resources. Close your web browser on your computing device.
All campus computers come installed with the full suite of Microsoft office applications, now called Microsoft 365. Microsoft 365 also provides web-based versions of Word, Excel, PowerPoint, Outlook, OneDrive, OneNote, and Teams. OneDrive provides users with cloud storage, which integrates with traditional Microsoft office products and the new the web-based apps.
Accessing Microsoft 365 Applications
- Log in to MAVzone.
- Select Applications in the Navigation Bar.
- From the applications list, launch OneDrive.
- Along the top of the browser page, find and click the NEW drop-down menu.
- Choose the type of file you want to create and click on that choice in the menu.
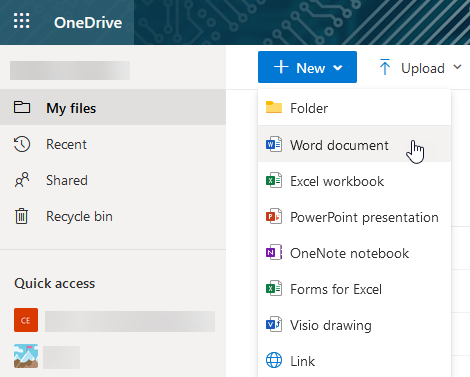
- A new file will be created and ready for editing in the web version of the respective application. As you work, the file will be automatically saved.
- Alternately, the Applications list also offers direct access to Word, Excel, PowerPoint, Outlook, and Teams.
Microsoft 365 Training Resources
Below are some very useful links to help you get the most out of Microsoft 365.
Enabling/Disabling Focused Inbox
- Launch Outlook and select the Inbox folder.
- At the top of the message list, notice the tabs labeled Focused and Other. These indicate you are in the Focused Inbox mode.
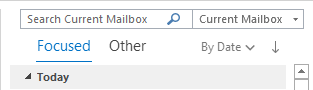
- To disable, notice the Arrange By option to the right of Other. The default setting for Arrange By is By Date.
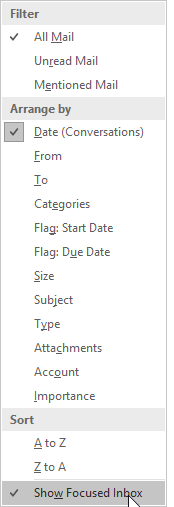
- Click on By Date, or your current Arrange By option. Then in the menu which appears, click the Show Focused Inbox option to disable this feature.
Enabling/Disabling Focused Inbox (Outlook Web Access)
- Once you are logged on to Outlook Web Access, look at top, right-hand corner of the page. There are several icons in this location.
- Click on the icon that looks like a gear. This is the Settings icon.

- The Settings pane will appear on the right-hand side of the page.
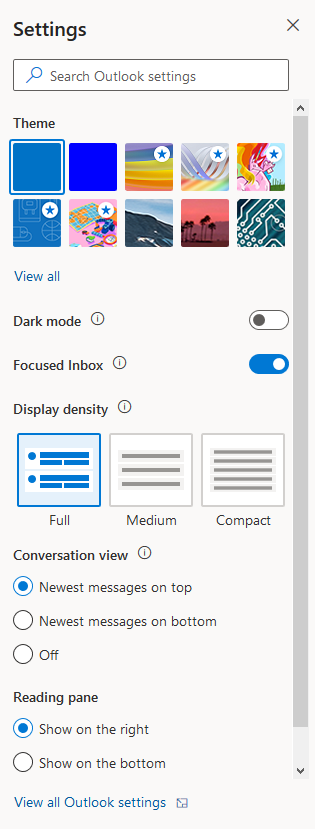
- Look for the Focused Inbox option. To disable the Focused Inbox, click the slider switch to the Off position. The Focused and Other tabs will disappear and the only tab you will see will be Inbox.
Chatting with Teams
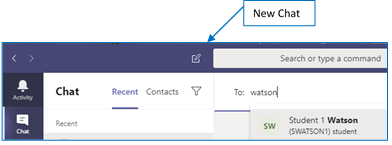
- In the title bar of the Teams window, click the New Chat button to begin a chat with someone. The Chat window will take focus. Begin typing the person’s name you want to chat with. The name list will begin searching for the user based on the characters typed. Try typing their last name first. If the list is very long, you’ll be able to scroll through the list.
- Select the desired name, then press Tab to place your cursor into the ‘Type a new message’ box. Type your message and press Enter or click the Send button.

Adding Contacts & Contact Groups
For people you anticipate contacting frequently you may want to add them to your Contacts list in Teams. You can also create Groups to organize your various contacts, perhaps by department for example.
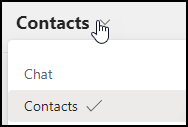
- In the Chat window, click the Contacts tab.
- To the right of Favorites, click the ellipsis button. Next, click Add a contact to this group.

- This will add the contact to the Favorites group shown in the Contacts list.
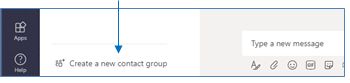
- To create your own group, click the Create a new contact group at the bottom of the Chat window. Then use the ellipsis tool next to your custom group to add contacts.
- When you click Add a contact to this group, the following dialog box will appear:
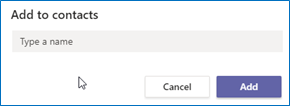
- Begin typing the contact’s last name and the same search function will engage as when starting a new Chat. Once you’ve selected the name, click the Add button to add it to your custom group or the Favorites group.
Changing Your Profile Picture
Upload a photo of yourself for your profile picture. This will show up in Teams, Outlook and any other Microsoft 365 application that shows the profile photo circle.
- Log in to MAVzone and click the Outlook Email (OWA) app icon.
- When Outlook appears, look to the top right‑hand corner and click on the Profile Photo circle.
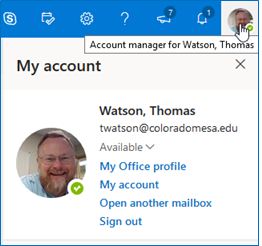
- Next, click directly on your photo in the drop‑down menu.
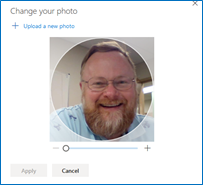
- Click on + Upload a new photo. Select your photo, click Open, then click Apply.
Additional Teams Training Resources
Microsoft Teams Training VideosChanging Teams AutoStart Option
It is highly recommended to leave Teams in 'auto-start' mode. This makes it possible for people to contact you without you having to remember to launch the application. Leaving the app run all the time will have minimal impact on your machine's performance. If you prefer to stop the application from auto-loading, follow the steps below.
- When Teams launches, look to the far right-hand corner of the title bar. Your Profile Photo circle will either contain your initials or your uploaded photo.
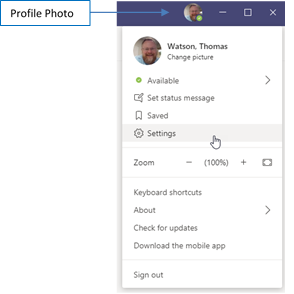
- Click on this icon and in the menu that appears, click Settings.
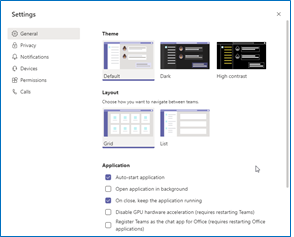
- In the next dialog box, you can turn off the Auto-start application option. Later to use Teams, you'll need to launch from the Start menu. Just close the dialog box to save any changes.
Teams can send and receive phone calls, store and playback voicemail, and offers many other features found with traditional telephones. Known as a softphone, CMU is performing a department by department migration from traditional desk phones to softphones using Teams. Your department will be notified in advance of the migration. The content below will help you to learn the features of the new softphone.
Important Terms
Secondary Ringer: By default, an incoming call will ring your default audio device. If you have a headset plugged into your computer it will ring the headset but not the computer speakers. Unless you are wearing your headset, you may not hear the ringer. Adding a secondary ringer will permit incoming calls to ring both the headset and the computer speakers.
Transfer: Transfers a call from your line to another line.
Consult Then Transfer: Allows you to speak with the person to whom you are transferring the call, prior to transferring.
Dial Plans
The default CMU dial plan provides faculty/staff local and domestic long distance calls without a long distance code. International calling is disabled by default. If you need to make an international call, please submit a Help Desk ticket. Indicate the date and approximate time you will need access to international calling.
Internal Calling: Dial the four digit extension of the person you wish to call. When you dial the four digit extension, the entire ten digit number will populate. This is normal.
External Calling: Dial the seven digit number (for local calls) or the ten digit number (for domestic long distance calls).
Placing an Internal Call
- In the App Bar, on the far left side of the Teams window, click the Calls view icon.
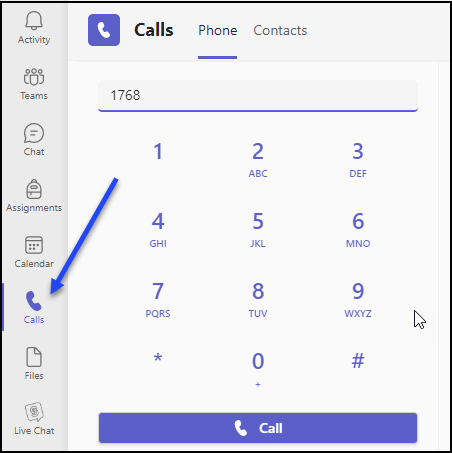
- This changes the view of your Teams window, providing features to support calling. Enter the 4-digit extension of the campus line you want to call. You can click on the numbers shown on the keypad, or type using your keyboard. Then to place the call, click the Call button below the keypad.
Placing an External Call
- In the App Bar, on the far left side of the Teams window, click the Calls view icon.
- For a local external call, enter the 7 digit phone number and click the Call button below the keypad. Domestic long distance numbers need to be entered as a 10 digit number.
Setting Secondary Ringer
- In the title bar of the Teams window, click the Settings and more ellipsis (three dots).
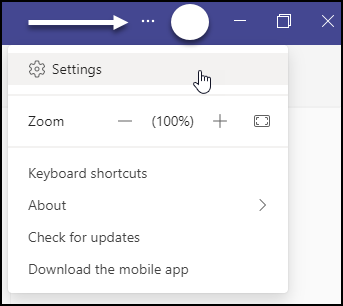
- Next, click Settings. The Settings dialog box will appear.
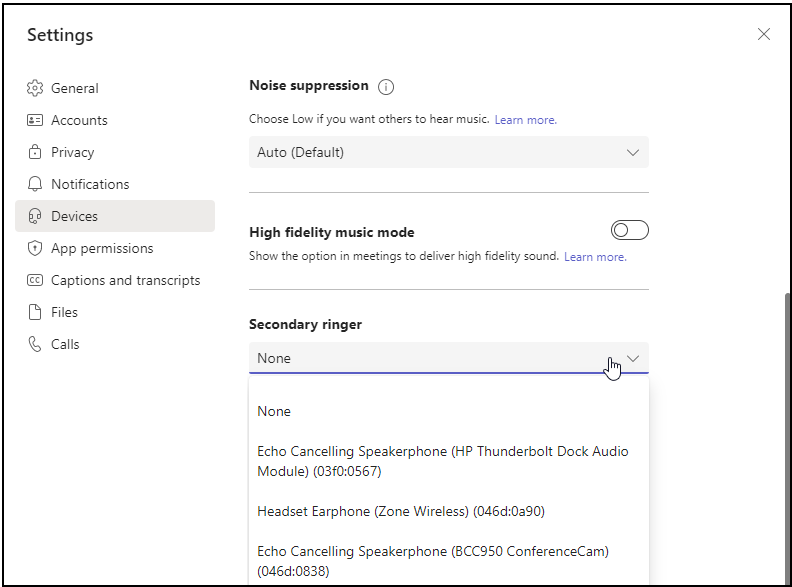
- Click Devices. Scroll the window down until you see the Secondary ringer option. Click this drop-down list and then select the audio output device to use as the secondary ringer.
- Click the Close button to close and save this setting.
Setting Up Voicemail
- In the title bar of the window, click the Settings and more ellipsis (three dots).
- Next, click Settings. The Settings dialog box will appear. Click Calls.
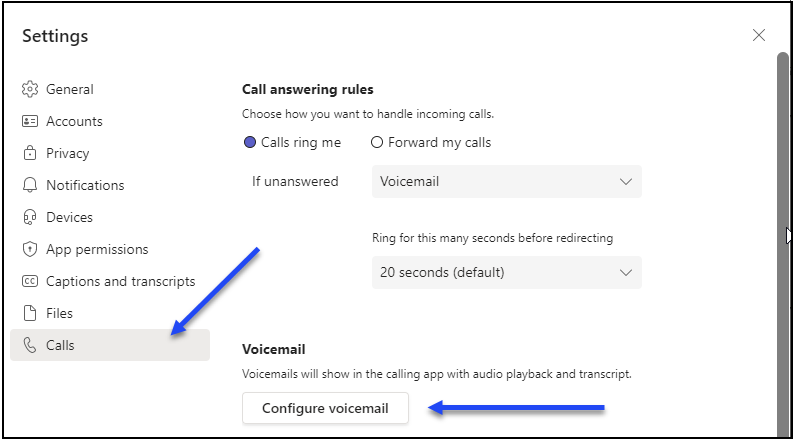
- Next, click Configure voicemail.
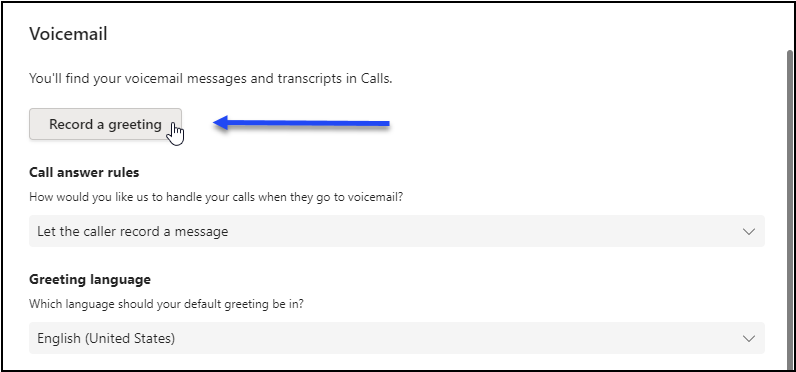
- The Voicemail dialog box will now appear. Click Record a greeting. Teams will then call the voicemail system and present the phone keypad on screen. Follow the audio prompts, using the keypad to make your selections and record your greeting.
Call Forwarding
- In the title bar of the window, click the Settings and more ellipsis (three dots).
- Next, click Settings. The Settings dialog box will appear. Click Calls.
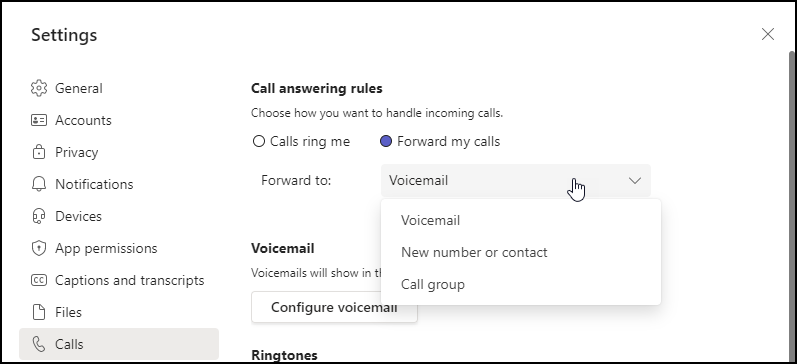
- In the Call answering rules section, choose Forward my calls option.
- In the Forward to drop-down list, choose from the options presented. When finished, close the dialog box.
Placing a Call on Hold
- While in the call, look at the toolbar at the top of the Call window. Click the Settings and more ellipsis (three dots) and in the drop-down menu, click the Hold button.
|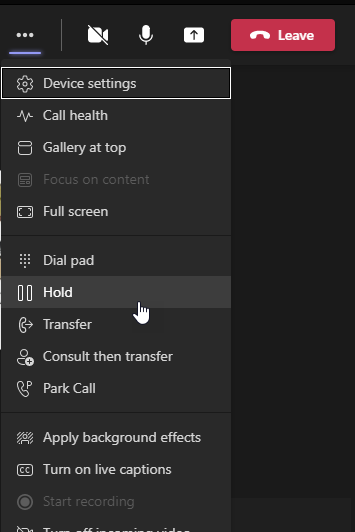
- Click the Resume button to continue speaking with the caller.

Transferring a Call
- While in the call click the Settings and more ellipsis (three dots). Then, in the drop-down menu, click the Transfer button.
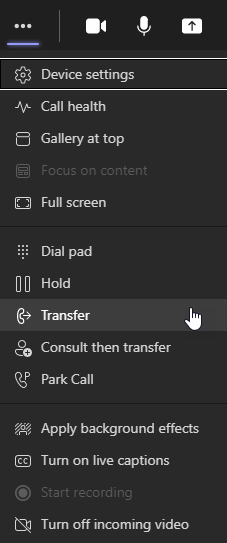
- In the next dialog box, invite someone by typing their last name or their phone number. Select the correct entry and click Transfer.
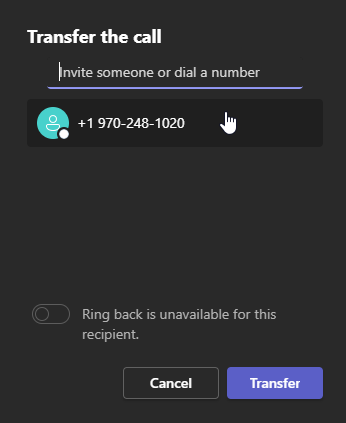
- The Call window will show a status of Transferring, and then the Call window will close.
Consult Before Transferring a Call
To speak to the person who will receive a transferred call before actually making the transfer, perform the following steps.
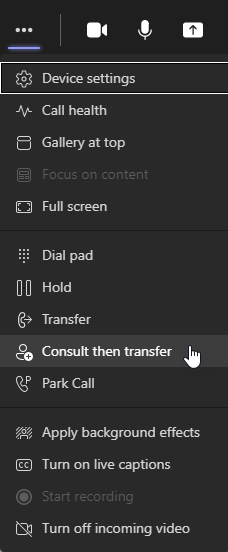
- While in the call, click the Settings and more ellipsis (three dots). In the drop-down menu, click the Consult then transfer button.
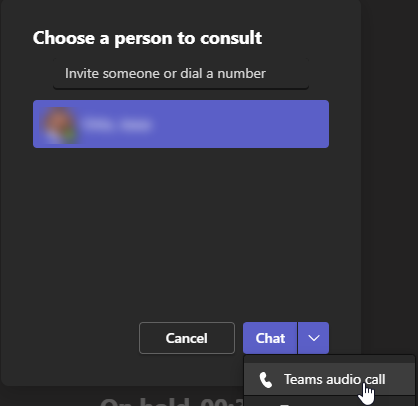
- In the next dialog, invite the person to consult with. Select their name/number. You can either Chat with them about the call to be transferred, or you can Teams audio call them.
- Once ready to transfer the call, at the top of the Call window click the Transfer button.

- The call will transfer and the Call window will close.
Technology Issues in Residence Hall Rooms
Issues with your Cable TV jack, WiFi access, or Ethernet jack should be reported to the Information Technology Help Desk. This includes connectivity issues with Cable TV, wireless, and/or Ethernet (hard wired).
- Log in to MAVzone and submit a ticket with the IT Help Desk app.

- Or, call the IT Help Desk at 970-248-2111.
All Other Issues in Residence Hall Rooms
All other issues in your dorm room should be submitted through Residence Life's maintenance reporting system. Click Maintenance Issues to report these types of problems.
To easily reset your MAVzone login password, use the 'I forgot my password' option on the MAVzone login screen as described in the following steps:
- From any Internet connected device, go to https://www.coloradomesa.edu.
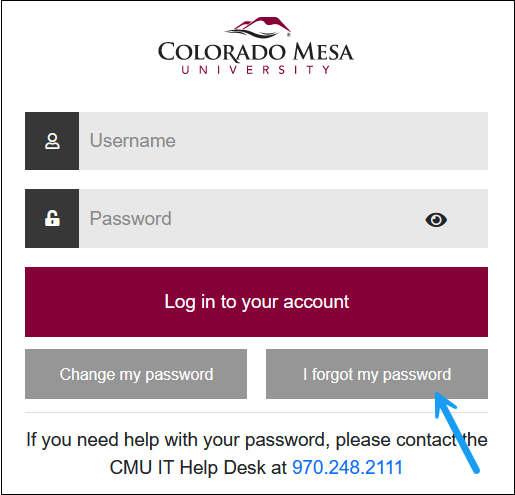
- Click the MAVzone button.
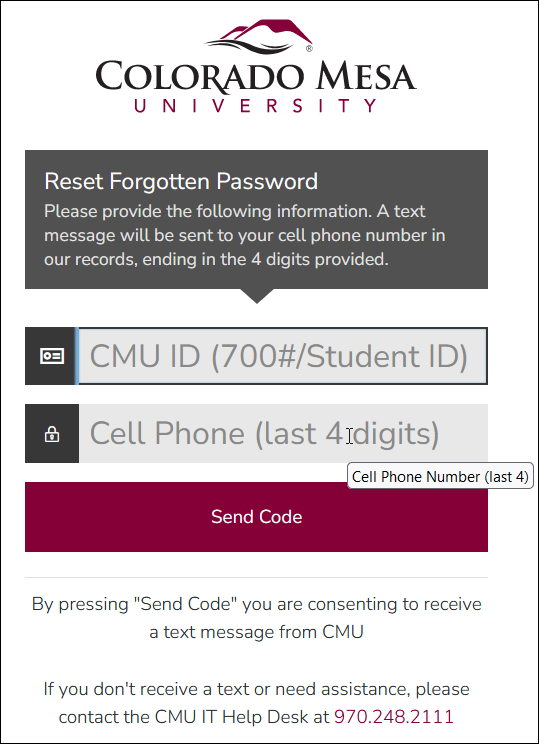
- At the login screen, click the I forgot my password button.
- Next, enter your CMU ID (700#/Student ID), and the last 4 digits of your cell phone on record. Click the Send Code button.
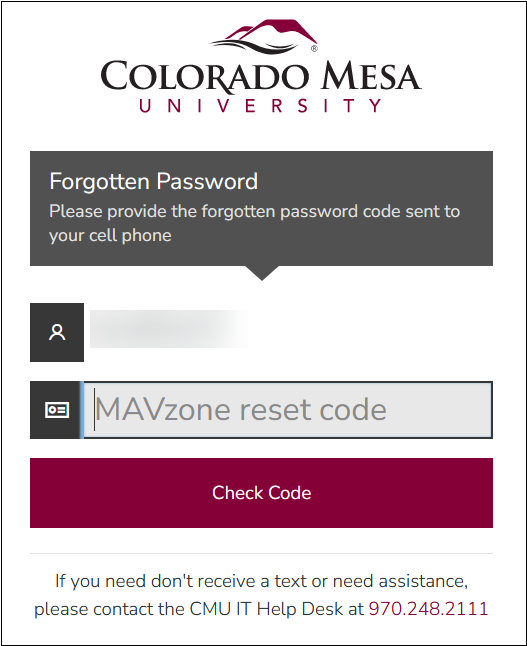
- In the next dialog box, your username will appear. Enter the MAVzone Reset Code you were just texted and click the Check Code button.
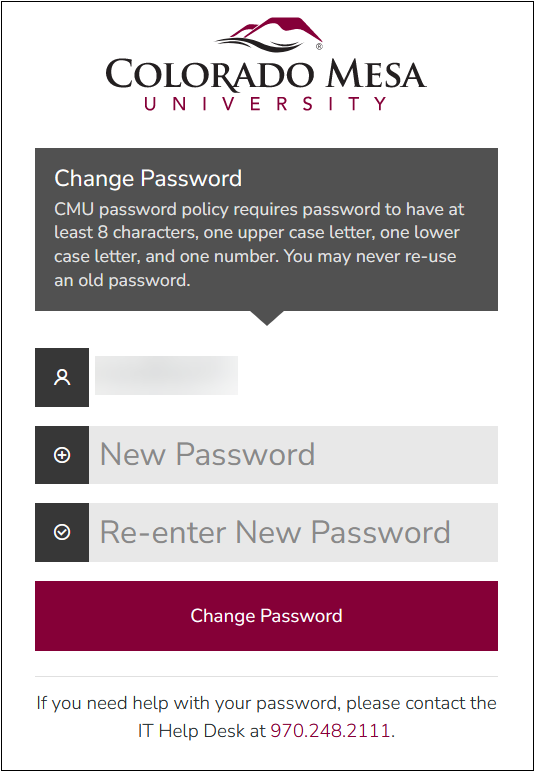
- In the next dialog box, enter your new password into each box, following the password policy described in this dialog. Click the Change Password button.
- Once the password has been changed, you will see the following dialog box:
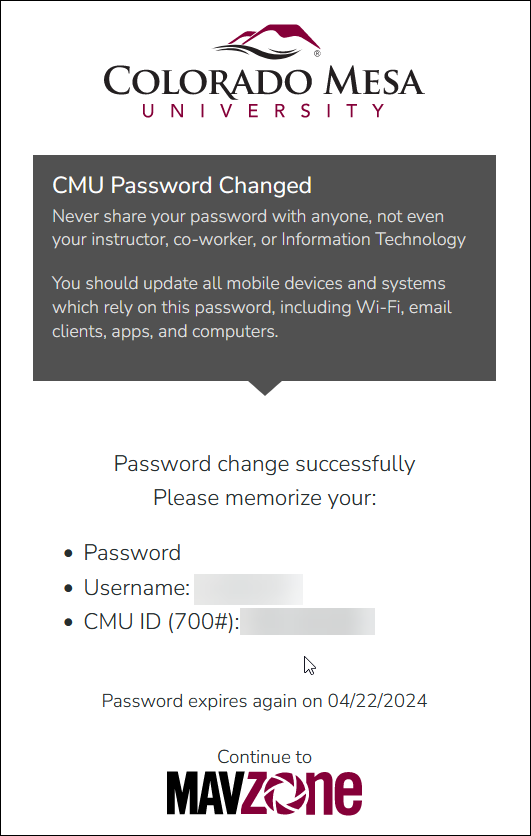
- Take a moment to note your Username and your CMU IT (700#). Memorize these two pieces of information to make future password resets easier.
- Be sure to update all devices that connect to the CMU WiFi immediately following a password change. These devices will persistently try to connect, with the old password, and will quickly lock your account. If you synchronize your CMU email to a personal device, update the password in the email application as well.
Password resets can also be done at the Technology Help Desk located on the 1st floor of Tomlinson Library. Make sure to bring your MAVcard. Finally, you can call the Help Desk, 970-248-2111, and request a password reset. Be sure to have your 700# memorized.
Synchronizing iOS with CMU Mail
- Tap the Settings app.
- Tap Passwords & Accounts.
- Tap Add Account. Tap Exchange.
- Enter your CMU email address and password and tap Next.
- Students have addresses of the form: [email protected]
- Faculty/Staff have addresses of the form: [email protected]
- Select which items you want to synchronize; Mail, Contacts, Calendars, Reminders.
- Tap Save.
Synchronizing Android with CMU Mail
- From the Home screen, tap Email.
- Enter your email address and password and tap Next.
- Students have addresses of the form: [email protected]
- Faculty/Staff have addresses of the form: [email protected]
- Next, select the type of account as Microsoft Exchange ActiveSync. The Exchange Server settings will be configured automatically and this step may take about a minute to complete.
- Next, you will be prompted to allow Remote security administration. You must permit this in order to synchronize your email on the Android device. Tap OK.
- Next, select from the various options regarding synchronizing. These options can be changed at any time. If you are unsure what to set, just accept the current defaults and experiment later. Tap the top right-hand corner triangle button.
- Confirm Activate device administrator by tapping Activate.
- Lastly, you'll be prompted to assign a different name to your account. This is optional and defaults to your email address. Make any desired changes, and then tap Done.
- The Mail app window will appear and synchronizing will begin. Full synchronization may take some time depending on the amount of mail being synchronized.